There is something great about January, everyone seems to be sorting; cleaning and making room for new projects and ideas. The sun is out, it's holiday's and somehow you seem to have extra time to do things that you have been meaning to get to, or know you won't once February kicks in!
Two dear friends of ours had a gorgeous baby boy just after Christmas so it was perfect timing to make something special for him. I did at first go searching in the shops for little wee outfits but to be honest I was greatly disappointed and secondly shocked that one teeny weeny item of clothing cost's minimum of $15 (and that was at an outlet store!) which will last all of a couple of weeks.
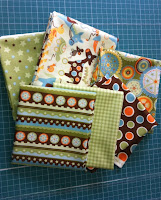
So into the most inspiring room in our house, the Sew Pretty room, I was really drawn towards the warm orange, brown and greens and Mod Todd seemed to be the perfect match. I needed to make something quick and simple yet luxurious as it was a special gift so I opted for a quick baby's quilt using the full set of pre selected colours & designs in the set and matched it with oh so soft white minky fabric.
Materials:
- Set of matching fabrics (6 Fat quarters works well for this size)
- 4 pieces of minky fabric
- Matching thread
Step 1
Out of 6 Fat Quarters cut out 36 6"x 6" squares (15cm x 15cm) You will have quite a bit left over perfect for matching items!
Step 2
Lay them out in any way you like, I prefer the ocd approach ;)
If you want to try keep the order of your quilt fold over matching sets of squares to sew together
Step 3
Sew the two squares together and iron open your seam. (This may seem like a waste of time but it makes a big difference to your finished result keeping everything neat) I keep the ironing board next to me while I am sewing so it is quicker.
Step 4
Place those squares back into your patchwork picture and continue to sew the squares together until you are left with 6 completed strips.
Step 5
Now sew these 6 stripes together, once again pressing open the seams as you go.

Step 6
I decided to use 4 minky squares which I sewed together to form a square. This is the cheapest option instead of purchasing an entire metre. (Remember this is replacing a wadding & backing fabric so take this into consideration when looking at the cost) If you have not used minky before it is much easier to use with a walking foot (which pulls the fabric at the top and bottom at the same time instead of just the bottom feed dogs working) but you could give it a go without it.
Step 7
Place your completed top patchwork over the minky leaving equal large gaps to allow for stretch. Then pin it together. Sew the first top side then unpin and readjust to allow for movement, continue this until you are on the last side and then leave a gap for turning. Cut off any excess minky before turning it out.
Step 8
And there you have it one gorgeous baby blanket soft & thick and cuddly! Sew around the edges and in between the joins on a few corners to secure it. You can also tie your quilt using crochet cotton. (gotta find a better video than that, but it does quickly show you how to do it!)
Bundle it up and it is ready to go! Now I better get this posted ASAP!


That looks great. And I do love that act its not just blue :D
ReplyDeleteVery cute!
ReplyDelete